Do you want to make your own sourdough starter and bake delicious loaves of sourdough bread? Then this is the guide and tool for you.
Making a sourdough starter is simple and all you need is flour, water and time. A sourdough starter is simply a cultivation of natural bacteria and yeasts that works the same way commercial yeasts you buy from the store do. To cultivate a vigorous and powerful sourdough starter from scratch takes about 1-2 weeks.
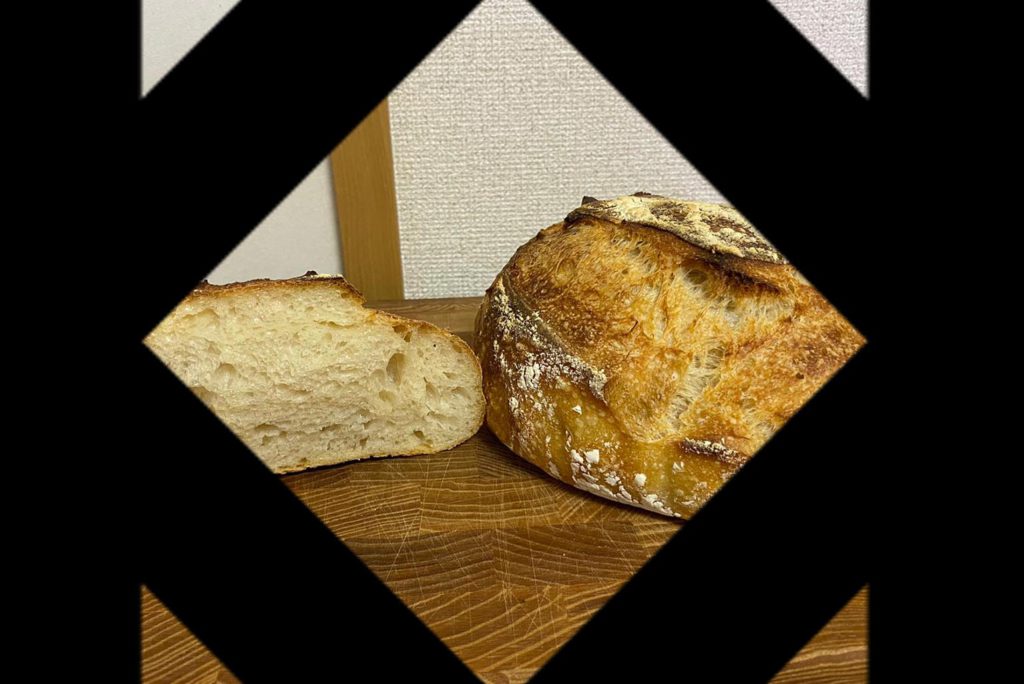
The benefits of baking sourdough over commercial yeasts is that a loaf of sourdough will have much more complex and deep flavours. Thanks to the higher acidity (sourness) sourdough bread has a longer shelf life than traditional bread. Many people also find it easier to digest sourdough bread due to the long fermentation process breaking down the gluten in the flour.
Moreover once you have your active sourdough starter it will be unique to you and the environment you are baking in. The bacteria and yeasts cultivated in your starter come from your flour itself, but also from the air in your kitchen and from your hands as you handle it.
No two sourdough starters are the same and you will over time learn to feed and care for your starter like a little bubbling pet made out of flour and water. In fact there are certain sourdough starters that have been passed down the generations for hundreds of years.
What you need to make a sourdough starter
To get started all we need to do is mix flour and water, and then continue adding or feeding flour and water over 2 weeks until the sourdough starter is bubbly, active and rising vigorously after each feed.
What flour should I use?
You can use any flour you have at home to make the sourdough starter. Experienced bakers prefer using unbleached flour as it already contains more of the beneficial lactic acid bacteria inside. Mixing all purpose flour with 10-30% rye flour helps speed up the sourdough starter and get more consistent results but it’s not necessary.
If you want to use a mix of flours I suggest you premix them to the right ratio before you start and keep it in a bowl as it will save you a lot of time from having to get the mixture right for every single feeding.
For 90% unbleached all purpose flour and 10% rye flour mix:
- Unbleached all-purpose flour 450g (15.8 oz)
- Rye flour 50g (1.7 oz)
For 70% unbleached all purpose flour and 30% rye flour mix:
- Unbleached all-purpose flour 350g (12.3 oz)
- Rye flour 150g (5.3 oz)
Store in an airtight container in an easy to reach place for your daily sourdough starter feedings. Depending on how long it takes your sourdough starter to get active and the feeding ratio (see below) you may need to mix up another batch after the first week.
Do I need whole-grain or dark rye flours for my sourdough?
A common misconception is that you need to use whole grain flours when making sourdough breads or a sourdough starter. You can make sourdough out of any flour and if you are looking for a lighter white bread you can just use all purpose flour. Make sure you avoid flours that have preservatives in their ingredient lists as these can negatively affect the fermentation process.
Can I use tap water?
You can use any drinkable water for your sourdough starter feedings. But if you live in a place with heavily chlorinated water (smell it) it’s a good idea to either boil the water (and let cool), or leave the water out overnight to ensure the chlorine has dissipated.
What container should I use for my sourdough starter?
We recommend using a glass or plastic container for your sourdough starter. The starter will get slightly acidic so it’s best not to use any reactive materials such as metals. Ideally you want the container to be wide enough to easily add and mix flour and water for your daily feedings. It should also be narrow enough that you can visually see how the sourdough starter is rising after each feeding. Our goal is for our starter to rise to 3 times its original height within 4-8 hours of feeding, that’s when we know the starter is ready.
Keep rubber bands around your sourdough starter container to measure growth
Add rubber bands around the outside of your sourdough starter container to measure how much it’s growing after feedings.
- Place the lowest rubber band at the baseline of where the starter is right after feeding
- Place a second rubber band at 2x the height of baseline
- Place a third rubber band at 3x the height of baseline
Record the weight of your glass sourdough containers
Before you start it’s a great idea to measure the weight of your sourdough container and keep a note of it on your phone or somewhere in the kitchen. All too often we forget to tare/zero the scale before the feeds, and if you don’t know the container weight all you can do is to empty the container and weigh it again, with all the washing up that comes with it.
Keep two identical containers
With the daily feedings it can be a great idea to have a second container on hand that is clean, it will help you both to measure out starter into a fresh clean container, and if the current container you are using starts to get messy, it’s a good idea to transfer your starter to a clean container to avoid mold growing on the edges of the glass.
Making the sourdough starter
Day 1: Mix flour and water
To begin, mix 10g (0.35 oz) flour and 10g (0.35 oz) water in your container.
Cover the container with cheese cloth, a towel, or a loose fitting lid. We want to make sure no insects or flies get into the container (fruit flies are very attracted to the CO2 produced during the fermentation process). When flies land on foods they lay eggs and that is one of few things that will actually ruin our starter, the others are overheating the starter or exposing it to direct sunlight.
Place the container inside the HakkoBako chamber and keep it dark. You can also place it in warm and dark place in the kitchen. The ideal temperature range is between 26-28°C (78.8-82°F).
Day 2: Introduction to Feeding Ratio (Starter: Flour: Water) and discard
We will be feeding the sourdough starter based on a feeding ratio of starter : flour : water. This lets us accurately know the ratio of starter to feed (flour and water) and will also be useful to know the hydration of the starter when it comes time to bake.
The first week as we are establishing the sourdough starter we will feed it on a 1:1:1 ratio.
- Discard 20g starter (place the container on your scale and remove 20g) or take a spoonful of starter into a new clean container and measure out 20g.
- Add 10g of flour and 10g of water and mix well.
We will continuously feed the starter 10g of flour and 10g water this first week. Since we are adding a total of 20g (10g flour + 10g water) everyday, we also first need to discard 20g of starter before each feed.
This method lets us build an active starter without an excessive amount of waste of flour. In the second week we will slowly build up the feeds as the starter is more active.
Day 3-7: Keep going
For the next few days we will continue to discard 20g starter and add 10g flour and 10g water everyday.
During this time you will notice your sourdough starter bubble and be active on some days, other days it may be sluggish without much activity. This is perfectly normal and just keep on with the feedings as the lactic acid bacteria will be lowering the pH of the starter and the yeast will be establishing themselves.
You will also notice a range of smells from cheesy to beer, and everything in between. This is also normal and once you have passed the first week it will start to stabilize.
Forgetting to feed
If you forget to feed one day don’t worry, just keep up with the next feed as it will not have too much of an impact on the final result. If you need to leave or don’t have time to feed it over more than 2 days simply place the container in the fridge and bring it out to resume the feeds once you find the time again.
Day 7-14: Established sourdough starter culture
By now you should notice that your sourdough starter is becoming more predictable. It will start rising sooner after each feed and the variations in funky smells should be less. We can now start feeding the starter a higher ratio of flour and water. The starter is more grown up and can handle increased feedings. If you have time you can also begin feeding the starter twice a day at this point, however it’s not necessary. At this point ideally we want to be feeding the starter at the time it reaches maximum growth often within 6-12 hours.
- Begin feeding the starter with a 1:2:2 ratio, that means if we have 10 grams of starter, you should add 20 grams of flour and 20 grams of water.
Knowing when the sourdough starter is ready
How do I know when my sourdough starter is ready?
Your sourdough starter is ready to make delicious bread when it’s active and bubbling and rises up to 3x or more in height. Within 4-8 hours of feeding your starter it should begin bubbling and rise to about triple or quadruple in volume. If you can replicate this 3x or 4x growth over 2-3 feedings you can be certain that your starter is active and ready to use.
Water drop test
Some bakers also use the water drop test to see if their starter is active. To do this drop a small piece of your recently peaked starter into a bowl of water and see if it floats. If it floats it has a lot of air bubbles trapped inside and bakers may feel it’s ready to use for baking. However this method is not as accurate as testing the volume growth after feeding.
Is my sourdough starter safe
You should notice that your starter will start smelling fruity and a bit sour within the first few days of starting. It may even develop some unpleasant smells during the process, but just keep up with the feedings and don’t give up.
Unless you have a significant growth of mold in your starter there is no reason to discard it, so just keep up with the feeds until it has had enough time to establish the right cultures and stabilize.
Can I make a sourdough starter without a digital scale?
People have been baking delicious loaves of sourdough bread for thousands of years so as long as you keep feeding your starter with flour after it’s peaked and maintain enough moisture you will get sourdough starter in the end.
However to get more consistent and faster results we recommend you feed your starter based on a feeding ratio.
What can I do with the excess sourdough starter?
As you keep feeding the sourdough starter daily, you will quickly run out of space in your glass jar if you don’t discard. So you will need to remove some of the starter to make space for more feedings.
The first week we recommend you throw away the discard, but after the first week there are other great uses for it.
This semi-developed sourdough starter does not yet have the power to make bubbly and crispy loaves of sourdough it’s still packed with flavour.
- You can add some of the excess starter to your loaves of bread as a poolish to add depth of flavour.
- Mix it with more flour and water to make fermented pancakes or crepes. Fermented crepes get a wonderfully cheesy flavour. Making fermented mille crepes will bring your cake to the next level!
- Keep a container in your freezer to keep the excess sourdough starter until you have a use for it.
My sourdough starter is not active after 7 days
If your starter is having trouble getting active you can try adding a fresh grape or a raisin to the starter to help boost it with beneficial bacteria and yeasts.
Storing your sourdough starter
Once you’ve spent all this time to get your starter you want to take care of it for future use.
Store in the refrigerator
You can store the starter in the fridge indefinitely. Make sure that it is fully covered with a lid to avoid fridge smells to get into the starter or other cross contamination. After longer term storage it may begin to separate with water on the surface. This is perfectly normal and just stir or shake the starter to mix it together again.
You will need some planning before you begin using your starter again as it takes 1-3 days to get the starter active again. To reboot your starter from the fridge, simply take it out to reintroduce 26-28°C temperature and feed it the same way you did before once a day until it’s active again.
If you want your starter to resume a bit faster it can be a good idea to take it out and feed it every few weeks to keep it more active.
Backup your sourdough starter in the freezer
You can keep a small amount of your sourdough starter in the freezer as a backup in case your fridge starter is ever lost, or more often the case is that you may accidentally bake all of it, or some family member might mistakenly throw it away. Simply find a suitable freezer container or freezer bag, remove as much air as possible and store it in the freezer until you are ready to bring it back to life again. The freezer is like a big pause button, it will not kill any of the beneficial yeasts or bacteria you have cultivated. Similar to storing the starter in the fridge, to reawaken your frozen sourdough starter, remove it from the fridge and store it at 26-28°C until it’s active and bubbling again.
Dehydrate your starter
A great way of storing your sourdough starter for longer periods of time without having to worry about continually feeding it is to dehydrate the starter. It’s a great way of saving and securing the hard work you did in making your starter and also a great way to share it with friends, family and colleagues that are looking to get into fermentation and sourdough baking.
To dehydrate your starter consistently you it’s best to have a dehydrator with a strong fan that can remove as much moisture from the sourdough as possible.
How to dehydrate your sourdough starter
- Spread some sourdough starter on a piece of baking paper or on your dehydrator silicone rack. Spread it as thin as possible to speed up the time until it’s fully dehydrated. It may take between 6 – 12 hours to fully dehydrate your starter.
- Place the completely dry sourdough starter in a kitchen mixer and blend until a fine dust.
- Store in an airtight container in a dry cupboard until ready to reawaken it again.
How to rehydrate dehydrated sourdough powder?
To bring the dehydrated sourdough back to life again simply weigh equal parts sourdough powder with water. Add 1:1:1 mix to this, with daily or twice daily feedings until it is active and bubbling again. It may take 2-4 days to get the formerly dehydrated sourdough starter to come back to life again and start growing to 3x after feedings.
Alternatives to making your own sourdough starter from scratch
Making a sourdough starter is a journey that is both meditative and enjoyable. It’s sort of like raising a pet and after the process don’t be surprised if you have strong feelings of affection for your little jar of culture. However there is no denying that it takes a long time to get an active starter full of life that is ready to bake amazing loves of bread with. If you do not have the time to wait there are lots of great options to get ready and active sourdough starters.
Buy sourdough starters online
There are several online shops selling sourdough starters, with free home delivery. You can follow the instructions on the package of whatever you buy. But generally you need to feed these starters with a 1:1:1 for 2-3 days before they are fully active and ready to use.
Online fermentation culture exchanges
There are certain fermentation groups that will do culture-exchanges and share their sourdough starters. Some of these may even have a long history and provenance of the sourdough starter that can be quite fun.
Carl Griffith’s 1847 Oregon Trail Sourdough Starter is run by a group of enthusiasts that will send you some of their starter if you mail them a pre-stamped envelope.
Ask a local artisan baker for a small piece of their sourdough starter
If you’re lucky and have a great bakery nearby you can try buying a loaf of bread from them and asking if they are willing to share some of their starter. You won’t need much, 10 grams will be enough. These professional starters will often be incredibly active being able to peak up to 4x after feedings. Once you’ve brought it home try feeding it with a 1:1:1 ratio and see how well it raises.
How can I get a sourdough starter that is ready for baking faster?
If you’re in a hurry and want to get to baking delicious loaves of sourdough sooner there are some steps you can take to speed up the process. If it’s your first time getting into sourdough baking we recommend you just follow the simple steps of feeding your starter with flour and water. Adding these turbo boosters will help you get an active dough faster, but may require you to feed it to dough at a different schedule depending on how it’s rising after feeding.
Add dried or fresh fruits to your sourdough starter
To help speed up the process of developing the cultures of bacteria and yeasts in your sourdough starter you can add some dried fruits directly to your sourdough starter. Dried fruits such as raisins are often dried over long periods of time and have an abundance of the right kinds of bacteria and yeasts we want in our starter. Just make sure you use a good quality raisin that has not been treated with any preservatives or additives to increase it’s shelf life.
After adding the dried fruit keep feeding your starter as usual, but use the rubberband method to monitor how high it is peaking after feedings. Once it can peak at close to or above 3x it’s size continually for 2-3 feedings it will be ready to use.
Make yeast water to speed up your sourdough starter
To make an even more powerful culture boost for your sourdough you can ferment the raisins in a brine for 2-3 days, the raisins are packed with sugars and will ferment quite vigorously and quickly. Since it will be fermented only over a short period of time, it will not be necessary to add any salt to keep it safe.
Add apple cider vinegar or pineapple juice to your sourdough starter
As you continue to ferment and feed your sourdough starter, lactic-acid bacteria will consume the starch in the flour and slowly lower the pH of your starter making it increasingly sour. This sour environment is key for promoting the growth of the beneficial bacteria and yeasts we will use to bake delicious sourdough bread. To speed up this process, you can add a dash of apple cider vinegar, pineapple juice or a squeeze of lemon to bring the pH down. An active sourdough starter will have a pH of 3.5-5. However adding too much acid can negatively affect your sourdough, so simply adding a bit, similar to how you backslop kombucha is all you need. For a sourdough starter with a 100% hydration, add 2-3% of the acid. After this continue feeding the starter as normal and monitor it’s activity to see any increased fermentation effect.