Stop wasting bread! Turning Stale Bread into useful and flavour packed Bread Miso
Here’s a staggering fact: every year, our world is producing over 100 million tonnes of bread – and roughly 10% never makes it to our stomachs.
All that flour, water, yeast, and energy – the daily unsold loaves, the sandwich crusts your kids won’t eat, the forgotten baguette hardening on the counter – ends up in landfills or compost.
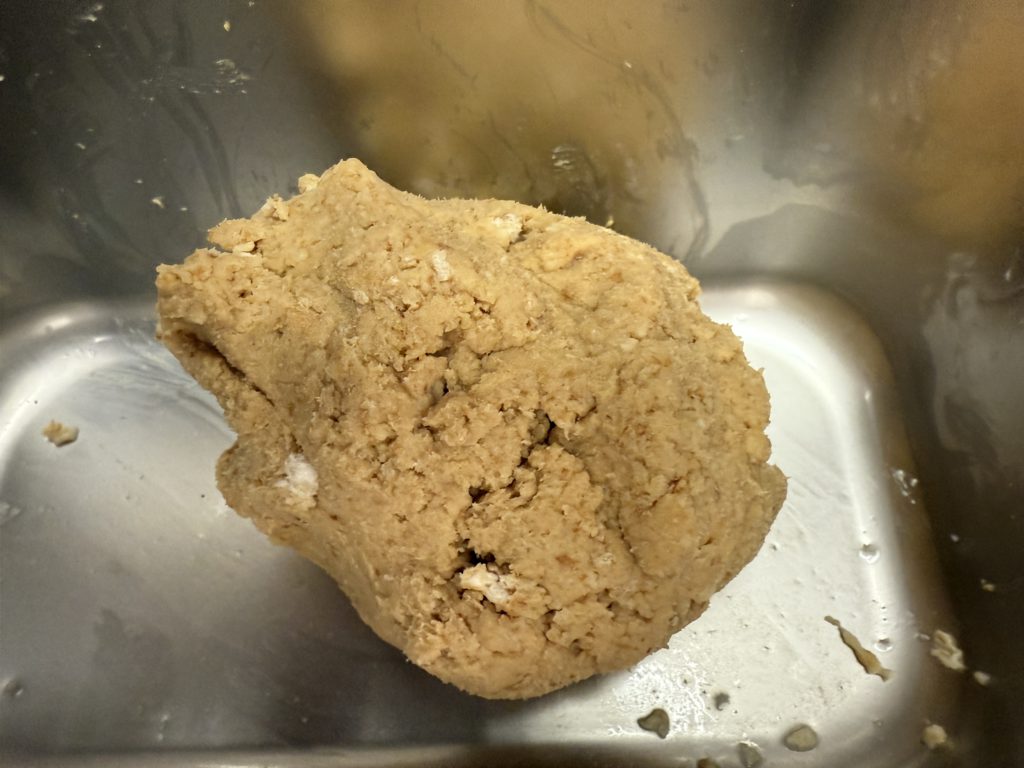
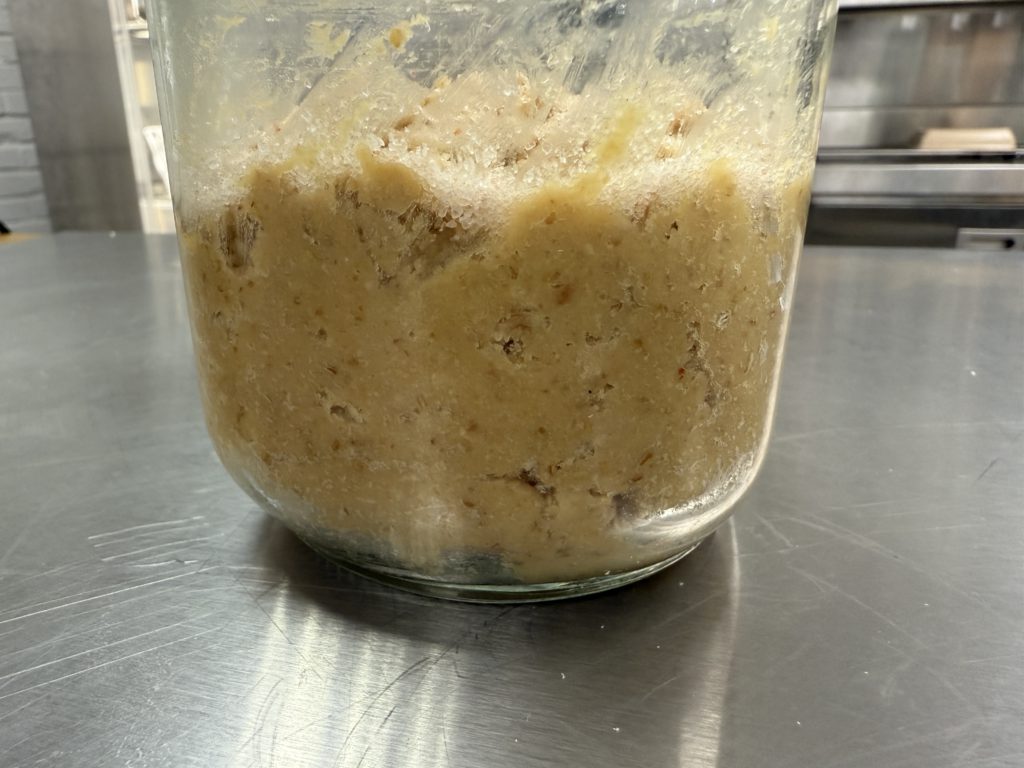
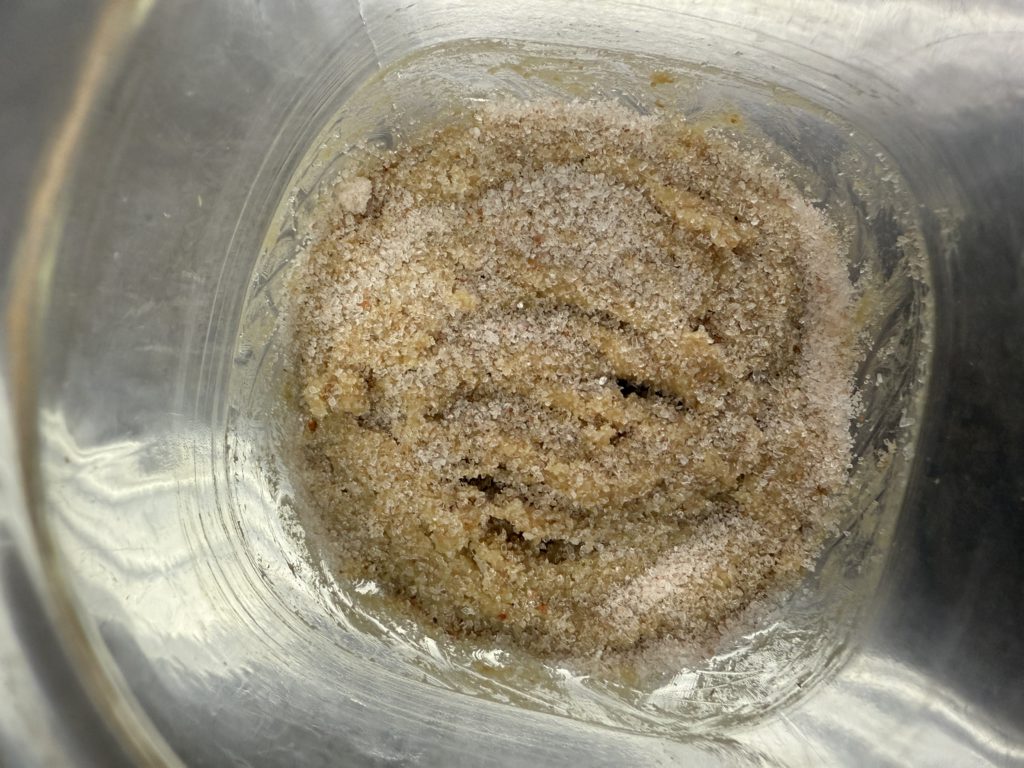
But what if we told you that stale bread isn’t waste? What if it could become something even more valuable than when it was fresh?
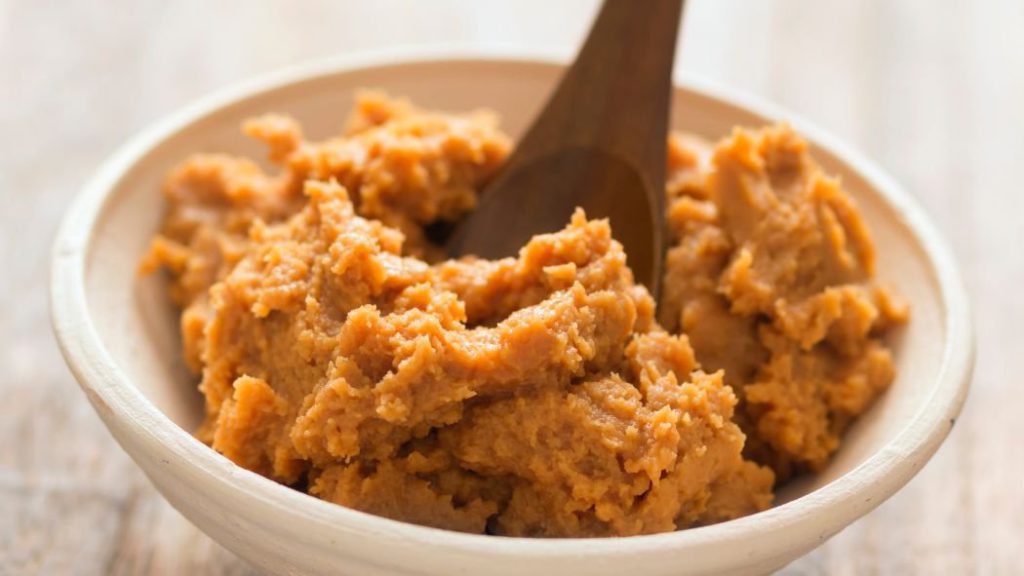
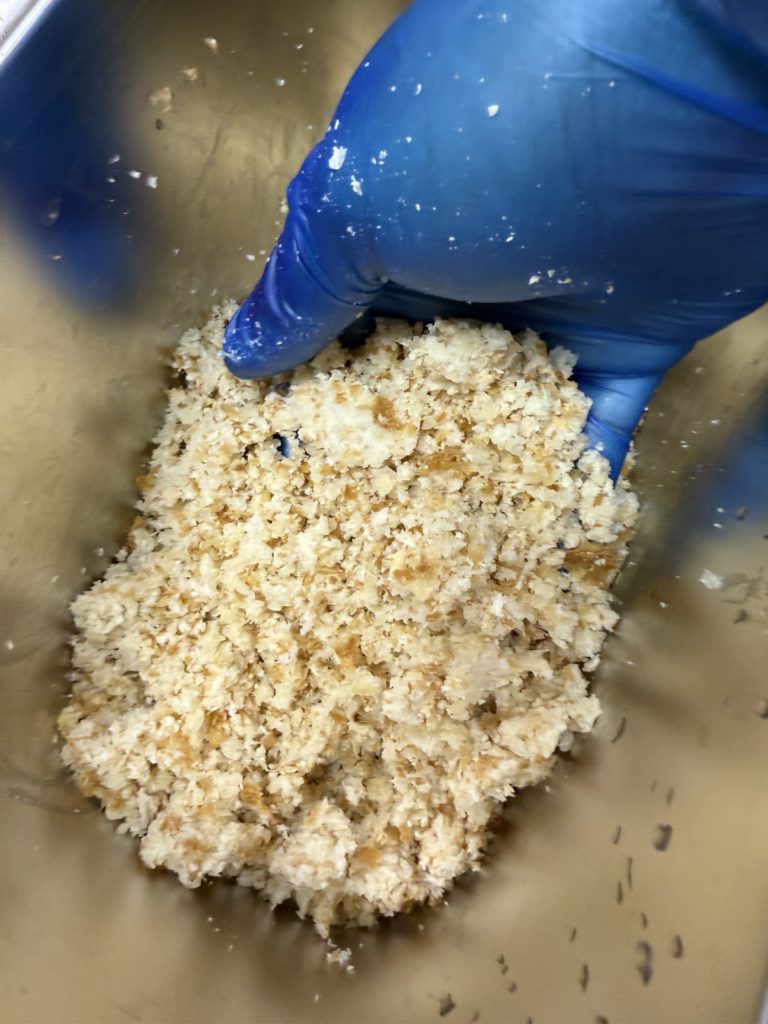
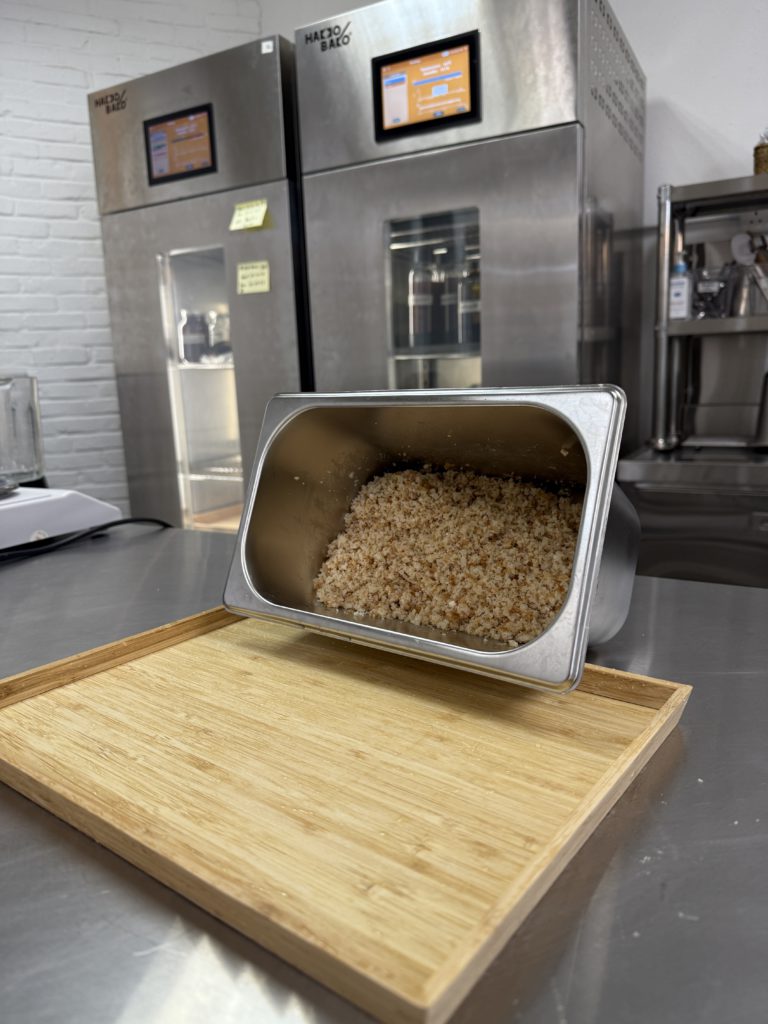
At HakkoBako, we’re passionate about fermentation as a tool for reducing waste while creating extraordinary flavours. Today, we’re sharing our method for transforming leftover bread into a deeply savoury, complex, utterly addictive condiment. This isn’t just recycling – it’s upcycling and turning bread into something magical.
What is Bread Miso?
Traditional miso is made from soybeans, rice or barley koji, and salt, fermented for months or even years. Bread miso replaces the soybeans with bread. The result? A funky, umami-rich paste that tastes like the love child of white miso and Marmite, with distinct nutty, bready notes that will transform everything you spread it on.
The Two-Step Journey
Bread miso requires two distinct fermentation stages:
- Making bread koji – transforming bread into a enzyme-rich fermentation starter.
- Making bread miso – the long, slow conversion into savoury magical paste.
Step 1: Making Bread Koji
Koji (Aspergillus oryzae) is the magic wand of Japanese fermentation. Normally grown on rice, it produces enzymes that break down starches and proteins into sugars and amino acids. Here, we’re teaching it to grow on bread instead.
Ingredients
|
Amount |
Ingredient |
|
250g |
Bread (stale, fresh, any type—though avoid heavily flavoured or sweetened varieties) |
|
100g |
Fresh rice koji (available at Asian grocers or online) |
Equipment
- Steamer or steamer basket
- Blender or food processor
- Wooden tray (or any breathable container to help fermentation)
- Plastic wrap
- Fermentation chamber with temperature control
- Toothpick or skewer for perforations
Method
- Prep the bread
Cut your bread into smaller pieces—about 2-3 cm chunks. Steam them for 10-15 minutes until thoroughly moistened and slightly softened. This hydration is crucial; koji needs moisture to grow.
- Crumble everything
Transfer the steamed bread to your blender and pulse until you achieve fine crumbs. Do the same with your fresh rice koji—blitz until it’s a fine powder.
- Mix and mingle
Combine the bread crumbs and koji crumbs in a bowl, mixing thoroughly until every all bread crump is incorporated with the koji.
- Set up for fermentation
Spread your bread-koji mixture onto a wooden tray in an even layer, about 1-2 cm deep. Wood is ideal because it’s slightly breathable, but any shallow container will work.
Here’s a pro tip: cover the tray with plastic wrap, then use a toothpick to poke small holes throughout. This prevents the mixture from drying out while still allowing oxygen exchange—koji needs to breathe!
- The fermentation chamber
Place the tray into a fermentation chamber set to 31°C (88°F) .
Duration: 48 hours.
Now, wait and observe. Around the 24-hour mark, you might notice a faint sweet, chestnut-like aroma. By 48 hours, something beautiful happens.
- The reveal
Open your chamber and inhale. That wonderful floral, almost fruity scent? That’s success. Look closely at your tray—you’ll see delicate white mould blanketing every crumb, just like traditional rice koji. The mycelium (those white threads) will have spread throughout, binding the breadcrumbs together into a cohesive cake.
Congratulations. You’ve just made bread koji.
What Now?
Your bread koji is now a living ingredient, packed with enzymes ready to work their magic. You can:
- Use it immediately for bread miso (below)
- Make bread shio koji by mixing with water and salt for a savoury marinade
- Experiment with bread shoyu (soy sauce) by adding water and salt and fermenting longer
- Refrigerate for up to 2 weeks, or freeze for months
But we’re here for miso, so let’s continue.
Step 2: Making Bread Miso
Ingredients
|
Amount |
Ingredient |
|
350g |
Fresh bread koji (from above) |
|
11g |
Salt (non-iodized—iodine inhibits fermentation) |
|
Optional |
A few tablespoons of water (only if needed) |
Equipment
- Blender or food processor
- Glass jar
- Salt for topping
- Plastic bag filled with water (as a weight)
- Fermentation chamber or place it in room temperature
Method
- Blend to a paste
Combine your bread koji and salt in a blender. Pulse and scrape down until it forms a cohesive paste. Here’s the test: scoop out a handful and try to form it into a ball. If it holds together without crumbling, you’re perfect. If it falls apart, add water one tablespoon at a time until it binds.
The texture should be like stiff cookie dough—pliable but not wet.
- Pack it in
Transfer your bread miso paste to a clean glass jar. Here’s the key: pack it tightly. Press down firmly with your fist or the back of a spoon to eliminate any air pockets. Air is the enemy of proper miso fermentation as it can harbour unwanted moulds.
- Salt the surface
Sprinkle a thin, even layer of salt directly on top of the miso. This creates a protective barrier against kahm yeast and unwanted bacteria. Think of it as a tiny, savoury shield.
- Weight it down
Miso ferments anaerobically (without oxygen). Place a weight directly on the surface to press out any remaining air and keep the miso submerged in its own liquids. A small plastic bag filled with water works brilliantly—it conforms to the shape of the jar and provides even pressure. Seal the bag tightly!
- Into the chamber
Place your jar in a fermentation chamber set to 25°C (77°F) .
Duration: 30 days.
Some traditional miso, needs to ferment for months or years, this is a “fresh white miso” style recipe. Thirty days at 25°C is enough to develop deep flavour while maintaining a lighter, brighter profile.
If your fermentation allows it can automatically adjust the temperature to 4°C (39°F) after 30 days. This halts the enzymatic fermentation, preserving exactly the flavour you’ve developed. (The 4°C step in your chamber program serves as a safety net—if life gets busy, your miso won’t over-ferment.)
The Result: What to Expect
After 30 days:
- Colour: Deepened bread-brown
- Texture: Thick, tacky, miso-like paste
- Liquid: A small amount of dark “shoyu” on top – pure umami concentrate
- Aroma: Toasty, savoury, slightly funky
- Taste: Strong umami, bread and nutty notes, sweetness. Think Marmite meets fresh miso – but entirely its own thing.
How to Use Bread Miso
A little goes a long way:
Spread it
- On toast with butter
- Swirled into oatmeal
- On grilled corn
Whisk it
- Into salad dressings
- Through mashed potatoes
- Into caramel
Marinade with it
- Brush on chicken, pork, fish
- Rub on roasted veg
- Mix with butter for compound butter
Soup it
- Stir into ramen, miso soup, tomato soup
Now start making your own Bread Miso!

